Remove rows
If there are errors in a column, you may wish to remove the rows entirely, depending on the business requirements. To do so, you can right-click a column header and select Remove Errors. Note that this will only remove rows where there are errors in the selected column. If you wish to remove all rows in a table that contain errors in any column, you can select the table icon to the left of the column headers and select Remove Errors.
Identify the root cause of error
When you see an error in a column, you can check the error message behind the error. To do so, select the error cell, and you will see the error message in the preview section at the bottom.
Note Checking the Cell Contents
In general, you can use this method—selecting the cell—to see nested cell contents such as errors, lists, records, and tables.
Though you also have an option to select the hyperlink, keep in mind that this will add an extra query step, which you will have to remove if you want to load the query later.
Figure 1-19 shows the error message behind the error we saw in the Postal Code column of the Customer query.
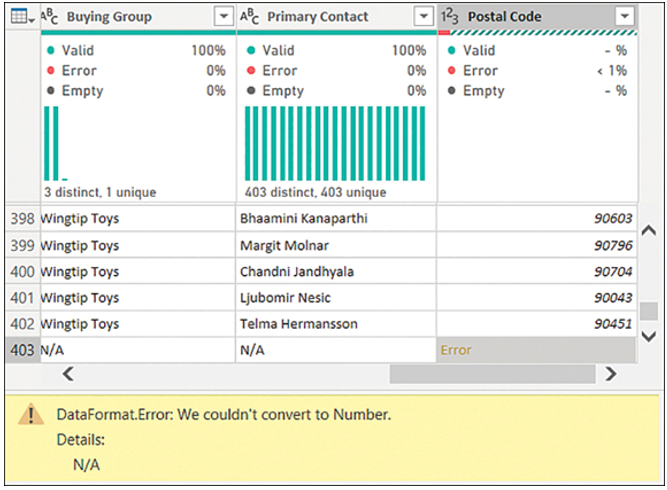
FIGURE 1-19 Error message
After seeing this error message, you know that the error happened because Power Query tried to convert N/A, which is text, into a number. To confirm this, you can go one step back by selecting the Promoted Headers step in the list of Applied Steps—the cell will show N/A, so you must transform the column type to Text to prevent the error from happening, as covered later in this chapter.
Although errors can happen for a variety of reasons, and not all errors occur because of type conversions, reading the error message will usually give you a good idea of what’s going on.